A Time to Expand, and a Time to Defend
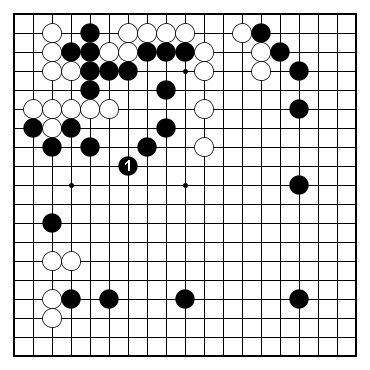
Black to play in Dia 1.
This looks like a territory vs. influence game: White has 3 territories - about 10 points each - while Black has a lot of potential on the right and lower right, but no definite territory except in the upper-right corner.
Black seems to have a good game - and it is his turn to move, too. Make sure you analyze the position well before making the next move.
 Dia 1
Dia 1
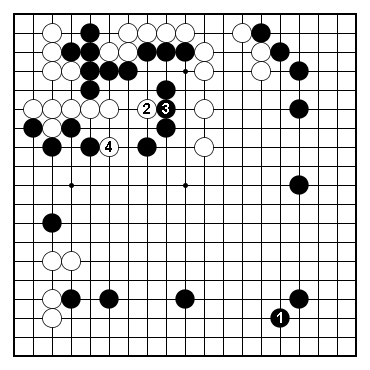
The lower right looks like the most interesting part of Black's moyo to expand - making a shimari here is standard. Dia 2 shows one of the many ways to strengthen a single hoshi stone.
If you focused on the Black moyo, though, you missed a very important aspect. Hint: think about balance, and positional judgement.
 Dia 2
Dia 2
While Black has a great moyo on the right hand side, his position is quite thin in the upper-left. Considering that Black's moyo is so good, he shouldn't take any risk but spend a move to connect his weak stones, as in Dia 3. Once he did that, there is nothing else to worry about and he can concentrate on the moyo.
 Dia 3
Dia 3
Dia 4 shows how White can split Black's positions in the upper left, causing trouble.
Black is thin in the upper left, and if White cuts here Black will have two groups to worry about.
 Dia 4
Dia 4
Conclusion
- Before starting on something juicy like building or expanding a moyo, make sure you don't have weak groups to defend first. Just imagine how exciting would be for your opponent to attack your groups if you don't defend!
Further study
- Positional Judgment
by Cho Chikun
- Attack and Defense
by Ishida Akira